Mead made on the cheap
After the success completion of my first batch of mead, I thought about how I could improve my mead making expertise. Namely, could I make smaller batches of mead to make things more manageable? Furthermore, I could I make a batch of mead that didn’t require investing in new equipment? On The Joy of Mead a post appeared about how to make a cheap one gallon of mead, which was right up my alley so I gave it a try.
In this mead-on-the-cheap method, instead of using expensive equipment you use the plastic jug of spring water itself to contain your batch of mead:
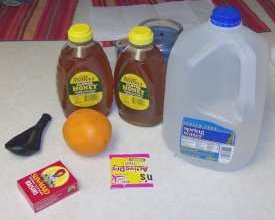
As you can see in the picture above, you don’t need many ingredients, and all these are available at a typical grocery store. In particular what you will need:
- 4 L spring water
- 1.5 kg honey
- An orange
- Small box of raisins
- Bread yeast
- A Balloon
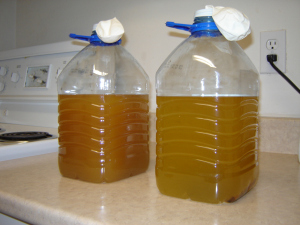
The orange and raisins take the place of the yeast nutrient on a previous post, and you use a balloon (with a couple of holes made with a needle) as a fermentation indicator/sanitation air lock. While honey is sweet and does provide enough food for the yeast to eat, it is actually quite poor in nutrients also needed by the yeast. Like all other organisms on Earth, yeast also need other minerals to ensure a healthy growth and reproduction, so you need to add some nutrients either in a special mixture made for yeast (found at wine supply stores or online) or you can use fruit.
In this recipe you proceed in the usual way by mixing the honey and water together, and heating the water to re-hydrate the yeast. In addition you add the raisins and the orange sliced into eighths to the honey-water mixture, called must. In my experience the white pithy portion of the orange’s skin can make the mead taste quite bitter, so instead of just slicing the orange, I have opted to use just zest the orange (the citrus oils are what we are after anyway) and the juice of the orange.
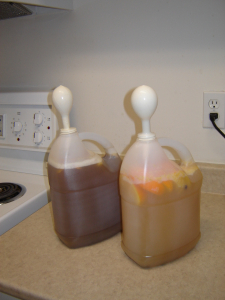
The container on the right is the orange clove mead made using alfalfa honey, and on the left uses manuka honey and fresh ginger root (peeled). After several weeks this is how these two varieties of mead changed:
In addition to the ingredients listed above for the orange mead (on the right), I also added a few whole cloves and a stick of cinnamon, thinking they would make a great tasting mead. I even replaced the cinnamon stick after I transferred the mead to the clean water jug, but when I finally bottled these two meads, I found that the cinnamon flavour was too strong. In the end, the orange mead had a pleasant citrus aroma, but no noticeable citrus flavour. Though as I mentioned in passing above, this mead turned out to have an unpleasant bitter aftertaste. Normally I like bitter beverages, but this didn’t sit well with me, especially with the strong cinnamon taste. The manuka and ginger mead turned out quite nicely, I really enjoyed the spice the ginger gave the mead.
That was it, I waited two months before I bottled these meads and started to consume them right away. Though just like wine, mead improves with age. Ideally you should leave mead to age for six months to a year, if you you can keep your hands off of it for that long. A possible way around that vexing issue is to make more mead, and more of it at once :)
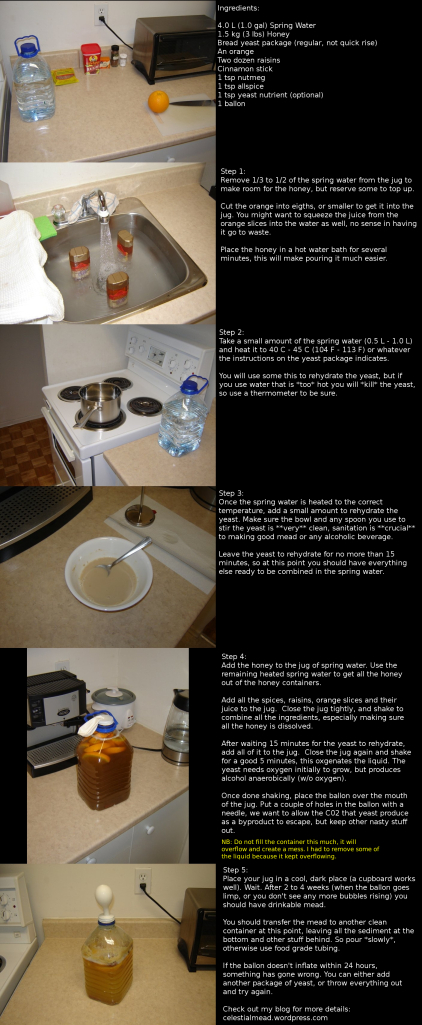
Update: In response to a request for a tutorial, I have created a pictorial set of instructions with some helpful comments. I am posting it here in case you want to explore making mead yourself: